
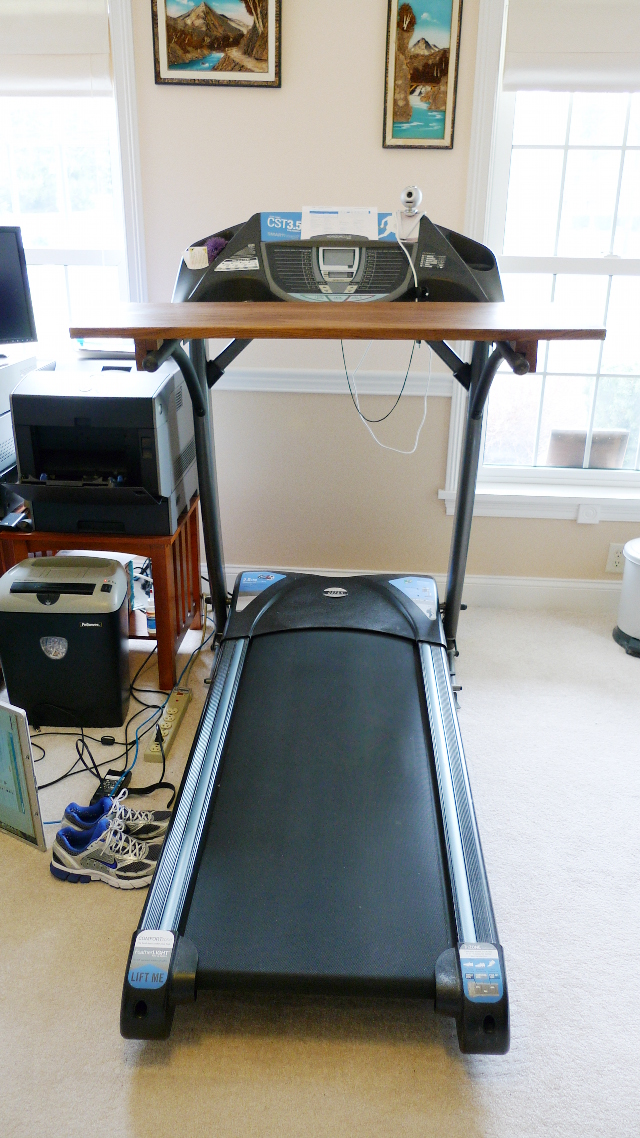
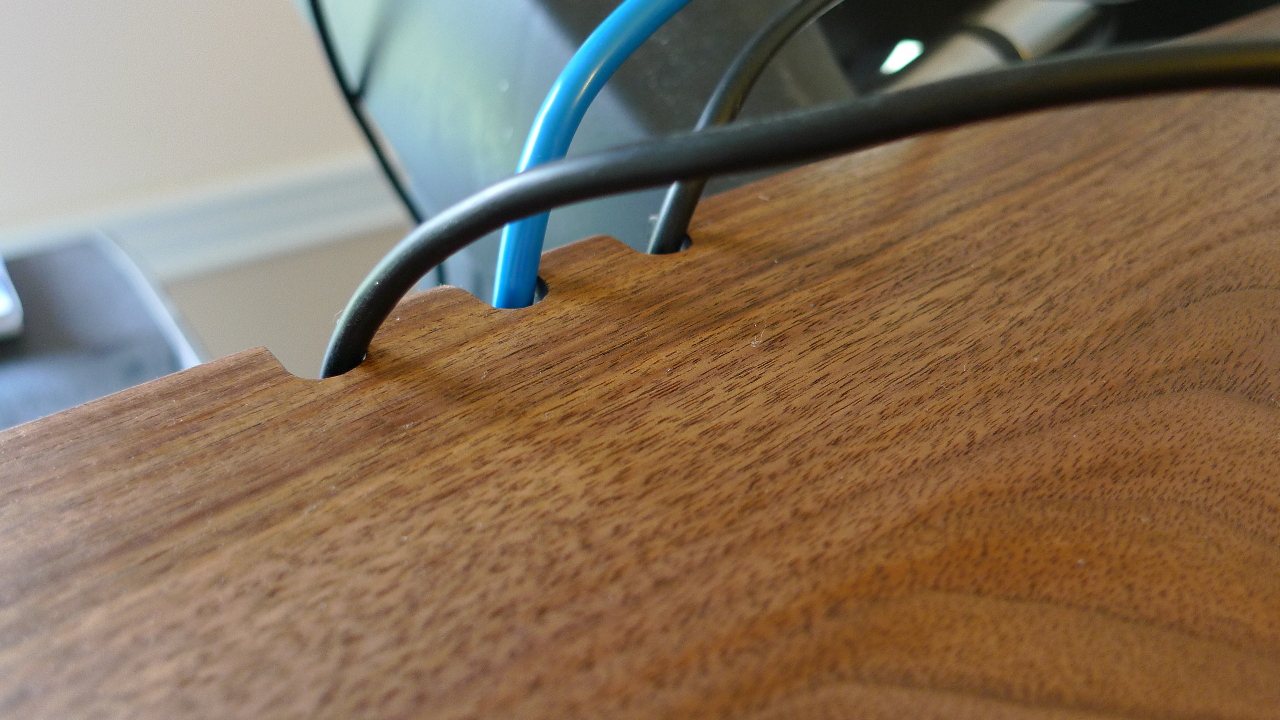
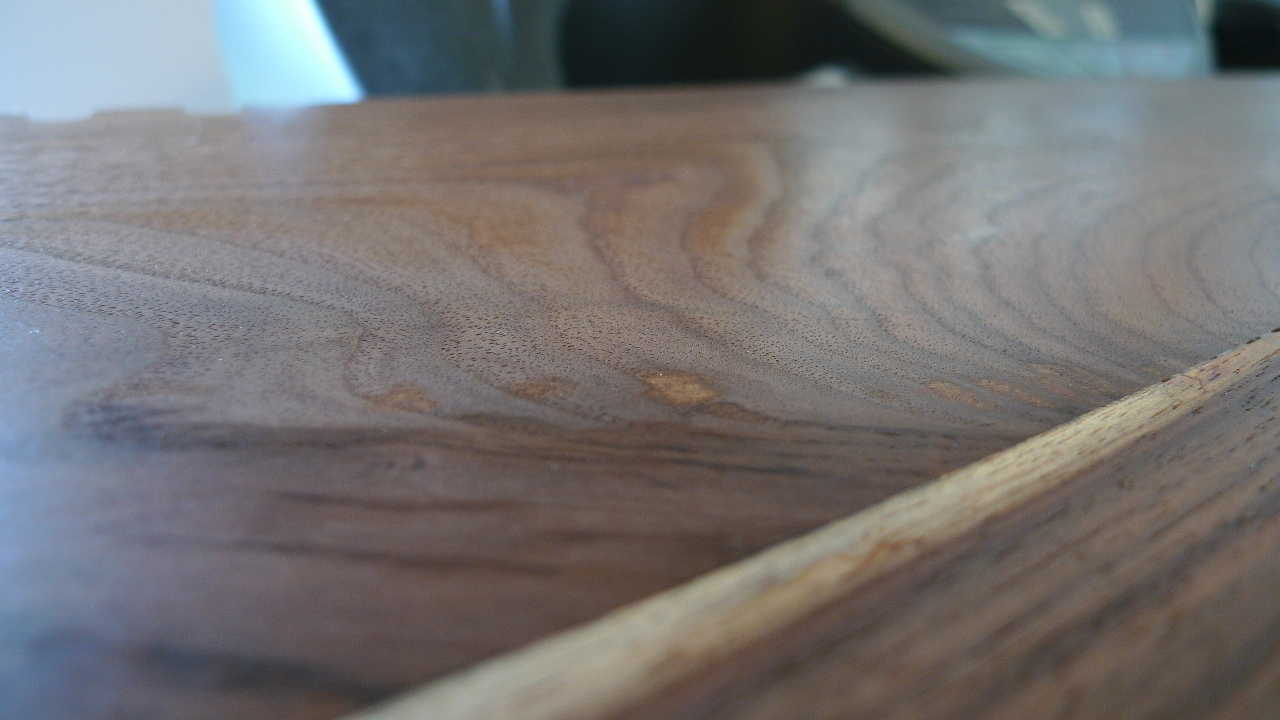
My dad and I put the finishing touches on the treadmill desk top, and it is both functional and beautiful. The wood is from dead walnut trees that had to be cut down, so I arranged for a portable sawmill service to turn them into rough boards about an inch thick. I have enough to make several more of these, if anyone’s interested 🙂 The desk surface isn’t 100% flat because I decided not to opt for a $1000 tool that would parallelize the top and bottom of the rough boards, but it’s close enough to flat that I don’t notice it unless I look for it. The surface consists of two solid boards joined with biscuits and then sanded with ever-finer grains of sandpaper with a combination of belt and orbital handheld sanders. Edges were smoothed with sanders, and the cable guides were made with a router. Finally, it was sealed with two coats of varnish to deepen the color and bring out the grain. The mounting method is easier to show than to describe, so take a look at the final thumbnail below for that.
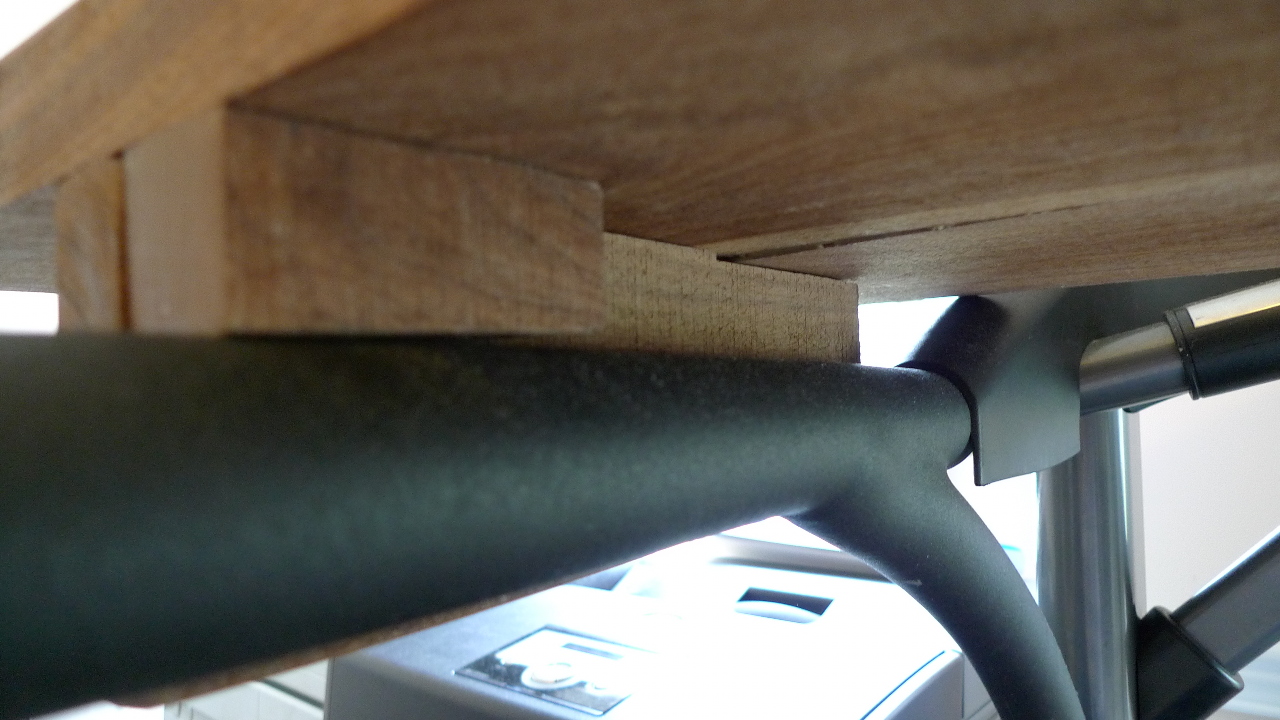
Click the thumbnails below for details.

Wow. Yours is way prettier than mine. I wrapped some shelf liner around a piece of scrap wood so that my keyboard and trackball wouldn’t slide around. I’ve been thinking of adding something like you did to change the angle, though – it’s a little odd and I don’t want to screw up my wrists. I give them enough grief with the fiber stuff already.
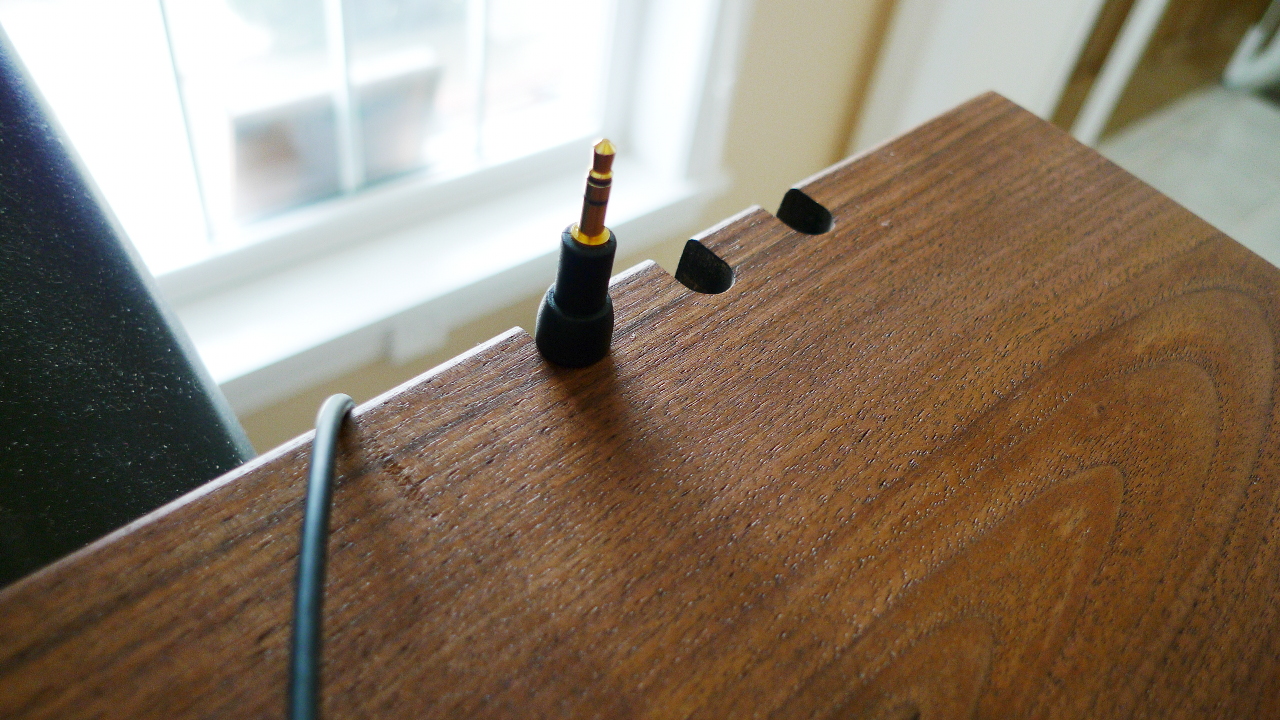
For the angle, we test-mounted the top and supported it with increasing numbers of thin wedges until it was the right height. If you don’t have wedges, anything that’s easy to increase or decrease in height should work. It doesn’t need to be level – a little bit of tilt toward you is arguably better anyway.
Once you have the height, cut some spacers (the close tiny block in the mounting view above) the same height and attach them on the underside so that they sit on top of the handlebars, in the same place where you measured the wedges. In order to keep it from falling off its delicate perch, you’ll need pieces (the larger piece of wood behind the spacer on the above mounting view) inside or outside the attached spacers that touch the sides of the handlebars. In my case, I mounted them to touch the outside of the handlebars.